Game Design I
From object interaction to playable systems.
You already design objects, materials, and how people use them. Game design is that same craft — pointed at behavior, feedback, emotion, and playable systems. Across eight modules you'll learn to design an interactive experience and bring it to a portfolio-ready playable concept package — using code, AI, and Godot as new prototyping materials.
What you'll build
This is a project-based studio, not a lecture series. You finish the course with a portfolio-ready playable concept package: a designed, paper-tested, partly-built interaction with full process documentation. (Turning it into a fully shipped web game is Game102.) Every module hands you one concept, one look at the DEMOLISH case, one short exercise, and one artifact to submit.
By the end, you can
- Turn a feeling into a clear experience goal and a one-verb design.
- Build and playtest a paper prototype, and iterate from real feedback.
- Read GDScript and direct AI to build a small Godot game (no prior coding needed).
- Design a character and a world, and direct AI to produce them on-model.
- Make a moment feel good (juice) and assemble a portfolio-ready concept package.
What you turn in (the concept package)
design brief → paper-prototype photos → playtest notes → AI prompt log → before/after iteration screenshots → playable concept package → postmortem
Studio milestone spine (Weeks 1–8)
One deliverable per week — together they are the final package. You always know what's due, and why.
Week 1   Interaction decomposition — the DEMOLISH X-ray
Week 2   Design brief — experience goal + one core verb
Week 3   Paper prototype + first playtest + crit
Week 4   Code-literacy sheet — annotate & change one function
Week 5   Character as a playable asset (sheet + one behavior)
Week 6   World board — palette / readability / audio
Week 7   3-person playtest + iteration log
Week 8   Portfolio concept package (everything, assembled)
Weekly rhythm & assessment
2 · inspect the DEMOLISH case
3 · do the short exercise
4 · submit one artifact
15% paper prototype + crit
15% code literacy / one-function change
15% character & world pipeline
20% playtest evidence + iteration
15% final concept package
Prerequisite: none — curiosity and willingness to make. Tools: Godot 4 (free), a browser, your hands, paper. Coding is taught from zero; AI fills the gaps.
The full syllabus
Pick a lecture on the left, or just press Next → at the bottom of each one. Modules 1–4 are nearly code-free — you'll see code (it looks like Python) but won't write it until later. The galleries, music, and the playable game are all real. Start with 1.1 — play what we built.
📋 GDScript Cheatsheet
Everything you need to read and write GDScript for this course, on one page. GDScript is Godot's language — it looks like Python, and it is not JavaScript. Skim it now; come back whenever you're stuck. You write real GDScript hands-on in Module 4, and the full 27-lesson interactive course (by GDQuest) is embedded in 4.9.
1 · Output & calling functions · lessons 1–4
You call a function by writing its name and (). print() shows a value.
print("Hello, world!")     # text → console
print(2 + 2)               # 4
move_and_slide()           # call a Godot behavior
2 · Variables — your knobs · lessons 7, 8, 12
var makes a named value the game reads. Mark it @export to tune it in Godot's Inspector with no code.
var speed = 220            # a variable
var lives = 3
@export var shake = 22.0   # shows as a slider in the Inspector
speed = 300                # change it anytime
3 · Math · lessons 9, 14
+   -   *   /   %          # add  sub  mul  div  remainder
var total = 8 + size * 2   # * and / happen before + and -
var rest  = 10 % 3         # 1  (the remainder)
4 · Strings · lesson 20
var name = "scout"
print("Enemy: " + name)        # join text with +
print("Armor: " + str(30))     # str() turns a number into text
5 · Conditions — rules · lesson 13
Compare with == != < > <= >=; combine with and / or / not. The ladder runs the first true branch.
if armor <= 0:
    explode()
elif armor <= 2:
    color = "red"
else:
    color = "green"

if lives > 0 and not paused:
    update()
6 · Loops — patterns · lessons 16, 17
for i in range(3):     # 0, 1, 2
    spawn_ship()

for i in range(1, 5):  # 1, 2, 3, 4
    print(i)

while lives > 0:       # repeat until false
    lives -= 1
7 · Arrays — lists · lessons 18, 19, 22, 23
var ships = ["scout", "gunship", "mothership"]
print(ships[0])            # scout   (counting starts at 0)
ships.append("drone")      # add to the end
ships.pop_back()           # remove the last
for s in ships:            # loop over every item
    print(s)
8 · Dictionaries — tables · lessons 24, 25
var level = {"ships": 4, "speed": 180, "music": "tense"}
print(level["speed"])      # 180
for key in level:
    print(key, level[key])
9 · Functions — behaviors · lessons 5, 6, 21
func packages steps under a name. A parameter feeds it data; return hands a value back.
func explode(size):            # size is a parameter
    shake = 8 + size * 2
    spawn_particles(size * 4)

func double(n):
    return n * 2               # hand a value back

print(double(21))              # 42
10 · The game loop · lessons 10, 11
Godot calls these for you. delta = seconds since the last frame → keeps speed steady on any machine.
func _ready():                 # once, at start
    start_music()

func _process(delta):          # every frame
    position.x += speed * delta
11 · 2D vectors & nodes · lessons 4, 15 + Godot
A Vector2 holds an (x, y). Nodes are the parts of your scene; reach one with $Name.
position = Vector2(100, 50)      # x, y
position.x += 10

$Music.play()                    # call a node's method
$Sprite2D.modulate = Color.RED   # set a node's property
12 · Types & type hints · lessons 26, 27
Values have types: int, float, String, bool, Array, Dictionary, Vector2. A type hint is optional but catches mistakes:
var speed: float = 220.0
var name: String = "scout"
var alive: bool = true
Errors are normal
When code breaks, Godot prints an error with a line number — read it, it's telling you exactly what and where. Fixing errors is most of coding; it's a skill, not a failure.
Module 4 has runnable GDScript (edit → Run → checked) for variables, conditions, and functions, plus the full GDQuest course embedded in 4.9. Read here, write there.
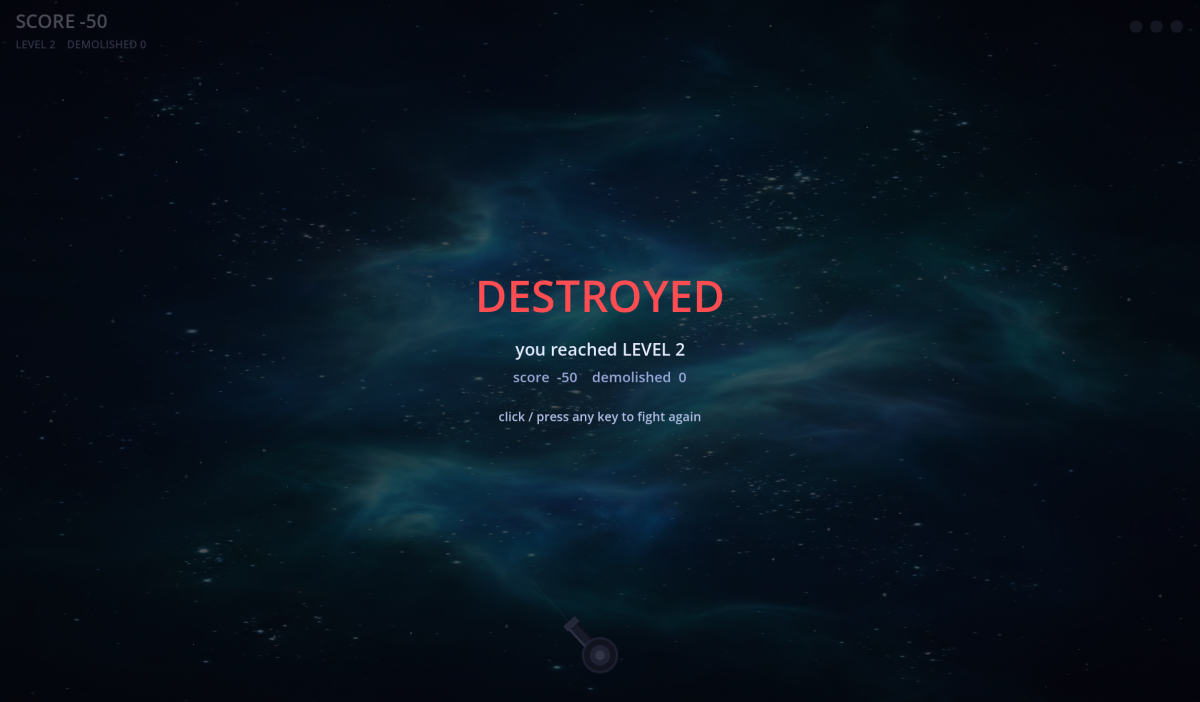
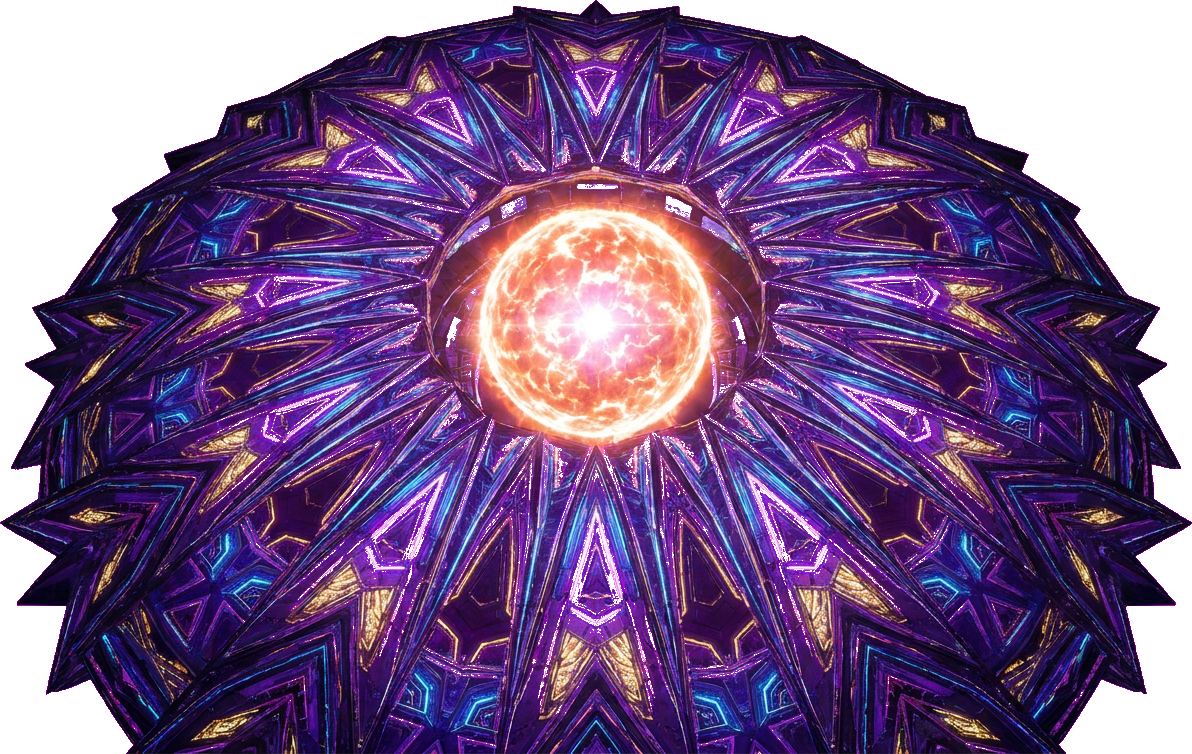
1.1 · Play what we built
Before any theory, meet the game. DEMOLISH is a small interactive product: a core action, a feedback system, an emotional arc, a set of rules, and a visual language — exactly the layers you already design in objects, now pointed at play. We'll decompose it across this module. First, play it.
Game not loading? Some networks block the host. Open it in a new tab — or here it is as a screenshot (a local build ships with the course):

How to play: hold left mouse to charge a shot, aim with the mouse, release to fire. Clear all ships to advance a level — but don't let one escape (10-second timer), or you lose a life. Three lives and it's over.
Everything you see — the cosmos, the ships, the music, the explosions — was made by AI. Everything you feel — the weight, the escalation, the "one more try" — was decided by a human. That gap is what this whole course is about.
The Designer's X-ray — your ID skills are game design
You don't start from zero. Every layer of a product you've designed has a direct game-design twin. This is the lens for Module 1:
| Industrial design | Game design | In DEMOLISH |
|---|---|---|
| affordance | input / control | hold to charge a shot |
| feedback | juice | hit-stop · shake · sound |
| product state | game state | lives · level · charge |
| form language | enemy tiers | scout → mothership |
| user testing | playtesting | "the last moment feels flat" |
Fill this X-ray for a game you know (or DEMOLISH): five ID concepts → five game-design moves → where each shows up. You'll see you already think like a game designer.
1.2 · From a feeling to a core verb
DEMOLISH did not begin with "let's make a space shooter." It began with a feeling:
"I want the player to feel the heavy, satisfying crunch of blowing something out of the sky — and the itch to blow up the next, bigger one."
That sentence is the experience goal (Module 2). From it falls a single core verb: pop / 打爆. Not "shoot," not "dodge" — demolish. One verb keeps the whole game small and focused.
Why one sentence matters
- It's the North Star: every later decision is checked against "does this serve the crunch?"
- It's testable: you can feel whether a build delivers it.
- It fits on paper — no graphics needed to know if the idea has legs.
Write one sentence for a game you'd love to make: "I want the player to feel ______." Keep it to a real emotion. That's your North Star for the rest of the course.
1.3 · From flat to satisfying
The first working version of DEMOLISH was dead. You shot a circle, its number ticked down, it vanished. The mechanic worked — but the most important moment, the kill, felt like nothing.
A tester said exactly that: "the last moment feels flat." That single observation produced the entire juice system you feel now:
- Anticipation — the target glows white-hot and jitters before it blows.
- Hit-stop — the game freezes for a few frames on impact → reads as "heavy."
- Screen shake, debris, flash, shockwave — emphasis, scaled to the ship's size.
- Sound — a low boom that drops in pitch for bigger ships.
The mechanic did not change. Only the feel did. That is the lesson at the heart of game design — and you'll play with it hands-on in Module 4.
Watch — the secrets of game feel
Game Maker's Toolkit breaks down "game feel" and "juice" — the same flat-to-satisfying transformation DEMOLISH went through, shown across dozens of games.
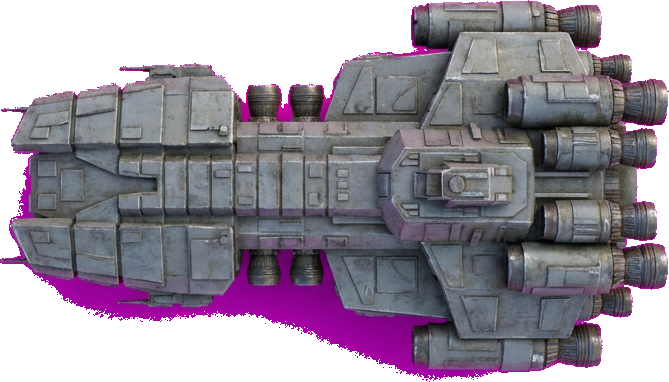
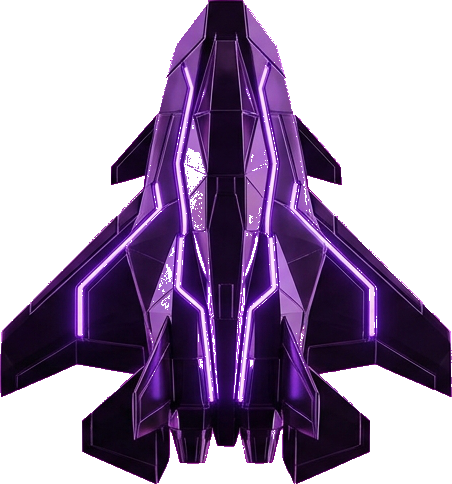
1.4 · The AI asset gallery
None of these were drawn or composed by hand. Eight cosmic backgrounds, eight enemy ships, six music tracks, and the sound effects were all AI-generated — from prompts a human wrote and curated.
Worlds (one per level, escalating)


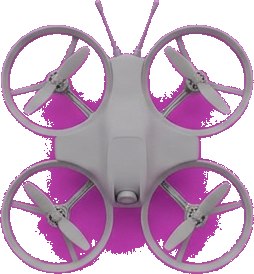
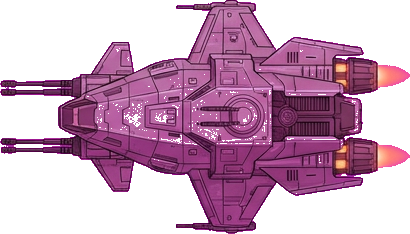
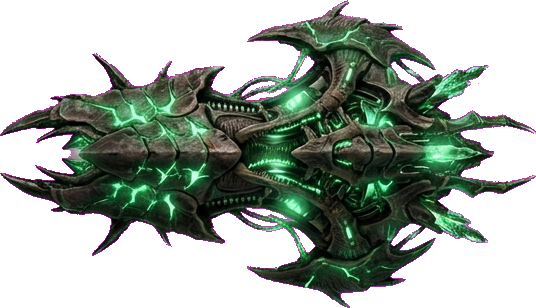
Enemies (tiered, simple → epic)
Sound & music
AI made all of it in minutes. Which one, in what order, with what feeling — that was the design. See 1.6.
1.5 · A peek at the code (don't learn it yet)
Here is the exact moment a ship explodes, in GDScript (Godot's language). Notice it reads almost like Python. You will not write code in the early modules — just see how a design idea ("bigger ship → heavier boom") becomes a few readable lines. Writing comes later, in Game Design II.
# when a ship's armor hits zero → demolish it
func _explode(tg):
    var big = tg.armor_max
    # bigger ship → longer freeze, harder shake
    freeze = clamp(0.04 + big*0.006, 0.04, 0.13)
    shake  = clamp(9.0 + big*1.6, 9.0, 28.0)
    flash  = clamp(0.45 + big*0.03, 0.45, 0.95)
    play_sfx(explo, "lower when bigger")
    for i in n:        # throw debris
        debris.append(make_chunk(tg.pos))
Left: the design idea as code. Right: the same idea, playable. You direct the feeling; the code is just how the engine hears you. If you can read Python, you can already read this.
1.6 · Roles — designer & artist in the AI era
DEMOLISH showed it in miniature; now zoom out to the industry. A shipped game is the work of many roles. Knowing them tells you where a human — especially a design/art-trained one — adds the most value, and which work AI is quietly absorbing.
The roles in game design & production
| Role | What they own | AI's effect |
|---|---|---|
| Game / Creative Director | the vision & experience goal; what the game means | 🟢 grows — more to direct |
| Game Designer | mechanics, systems, balance, the feel | 🟢 leverage; judgment is yours |
| Level / Narrative / UX Designer | space, story, pacing, the player's path | 🟡 AI drafts, you author |
| Art Director | visual language, palette, coherence | 🟢 essential — AI floods, you curate |
| Concept / Character / Environment Artist | the look, characters, worlds | 🟡 rendering automates; design stays |
| Programmer / Technical Artist | the engine, tools, performance | 🟡 boilerplate automates; architecture stays |
| Audio Designer / Composer | sound, music, the felt half | 🟡 AI generates; taste & sync stay |
| Producer / QA | scope, schedule, playtesting | 🟢 reading players stays human |
Where the human is most valuable in the AI era
AI is fastest at execution — rendering art, writing boilerplate, generating variations. It is weakest at judgment. So the value concentrates in the roles that are mostly judgment:
- Vision & experience design — deciding what the player should feel. (No prompt gives you this.)
- Art direction & curation — choosing the right one from a thousand drafts and making them cohere.
- Character & world authorship — giving things a soul and a meaning, not just a look.
- Taste & "is it fun?" — the felt judgment that comes only from making and playtesting.
- Integration — pulling design, art, sound, and feel into one coherent experience.
The sweet spot for an Industrial-Design background is rare and powerful: you can be both the designer (intent, systems, experience) and the art director (form, character, world) — directing AI across the whole stack. In the old industry these were separate departments; with AI as your studio, one person with taste can hold the whole vision.
AI executed
- 8 backgrounds, 8 ships
- 6 music tracks + SFX
- all the boilerplate code
The human directed
- the feeling (designer)
- "galaxy", "more wondrous", the escalation (art director)
- "the last moment is flat" → anticipation (designer)
- scoring, lives, escape rule (systems)
- when it was done (producer)
Module 1 take-aways
- Feeling before feature.
- Juice sells it — the mechanic barely changed.
- Small & complete > big & broken.
- AI executes; you decide — and in the AI era, deciding is the rare, valuable skill.
1.7 · The build log — how it really happened
DEMOLISH was built in one evening, as a live conversation between a designer and AI. It did not come out clean — it came out as a fast, messy chain of decisions, each one a human judgment. Here is the honest order it happened in.
- An instinct, then a feeling. It started as "a shoot-'em-up (打飞机)." But "shoot" isn't a feeling — so we narrowed it: of the three feelings a shmup can give (spray a wall of fire / weave through danger / blow something apart), we chose the crunch of a successful blast.
- Lock the verb & control. One charged shot, aimed by hand: hold to charge → aim → release → demolish. Charge bigger for a bigger boom.
- Build the bare mechanic. In Godot: aim, charge, fire, hit, destroy. It worked — and it felt like nothing.
- Name the flatness. Playing it, the verdict was immediate: "the last moment feels flat." That became the design target.
- Layer the juice. Hit-stop, screen shake, debris, flash, shockwave — all aimed at that one moment of impact.
- A design insight, mid-build. The target should warn you it's about to blow — glow hotter and jitter as its armor drops. Anticipation → release. (This idea came from the human, not the AI.)
- Fix what looks cheap. The cannon was an ugly circle → upgraded to a real rotating turret with a glowing muzzle.
- Add sound. A synthesized explosion (DSP, not AI — for exact control), then AI-generated music (Lyria) for the soundtrack.
- Give it a world. An AI image model (Gemini, "nano-banana") painted a real galaxy background.
- Grow it into a game. Two ships at once → a 10-second escape timer with a points-and-life penalty → lives → death.
- Escalate everything. Level N = N ships, faster each level; a grand level-up fanfare; increasingly wondrous AI worlds; tiered AI ships (simple → epic); per-level music; color-shifting projectiles; a mournful death theme.
- Tune from play. "Level 2 is too hard" → softened the curve. Scoring runaway → fixed to a clean level × 10.
- Finish & ship. Title screen, then exported and put online so anyone could play it.
Notice how few of these are about code, and how many are about feeling, taste, and judgment. That ratio is the job.
1.8 · The messy middle — intermediate products
Polished games hide their process. This one won't. Real making is a pile of intermediate products — rough versions, generated drafts, and bugs — that a human curates toward a feeling.
The same mechanic, two feelings
The first build and the shipped build play identically. The only difference is juice. That gap — flat vs. satisfying — is the entire reason game feel exists.
A flood of AI drafts — then human curation
The AI generated far more than we used: 8 cosmic worlds, 8 enemy ships, 6 music tracks, sound effects. The skill wasn't generating them — it was choosing which, in what order, with what rising feeling. The escalation arc (calm → sublime, scout → mothership) is design, not generation.
A real bug — and how you read it
At one point a ship's health jumped from 7 to 1006 when shot. The clue was in the number: 1006 = 7 + 999. A "remove this bullet" marker (the value -999) was accidentally being subtracted from the ship's armor — and subtracting a negative adds. The lesson isn't the fix; it's the habit: read the symptom, trace the cause. Bugs are part of building, not a sign you're failing.
Playtests that changed the game
- "The last moment feels flat" → the entire anticipation system (white-hot pulse before a kill).
- "Level 2 is too hard" → softer curve, faster charge, gentler speed ramp.
- "Score keeps ballooning" → clean level × 10 scoring.
Three sentences from players produced three of the game's best decisions. That is what playtesting buys you (Module 7).
AI produced
- dozens of asset drafts
- the boilerplate code (and the bug)
The human did
- curate & sequence the drafts
- name the flatness, read the bug
- turn playtest words into changes
- steer the mess toward a feeling
2.1 · The player experience goal
USC's playcentric method (Tracy Fullerton, Game Design Workshop) starts not with "what game" but with "what should the player feel?" — the experience goal. It is the single most important sentence you'll write, and the one every later decision is measured against.
Same four buttons — four different games. That first choice, the feeling, is the fork in the road; everything downstream (verb, rules, art, code) follows from it. That's why we start here, not with "what genre." Code can't make this choice for you — only a designer can.
Feature vs. feeling
- ❌ "Make a shooter." — a feature. It tells you nothing about whether it's good.
- ✅ "The heavy crunch of a clean kill, and the itch to blow up the next, bigger one." — a feeling, at a specific moment, that you can test for.
A method to write one
- Name the emotion — not "fun." Tension? Awe? Mastery? Loneliness? The click of insight?
- Pin the moment — when is it felt? The first 10 seconds? After a hard-won struggle? At the very end?
- The paper test — could you feel it with paper and dice, no graphics? If yes, the idea has real legs.
- The cut test — for any feature, ask "does this serve the feeling?" If not, cut it.
Three famous goals, reverse-engineered: Journey → "the awe and tenderness of a shared journey with a stranger." Tetris → "the calm, flowing satisfaction of bringing order to chaos." Dark Souls → "earned mastery through meaningful danger." Notice none of them name a genre.
Watch — when a feeling drives the whole game
Jenova Chen on designing Journey: how an emotional goal (awe, and connection with a stranger) — not mechanics — drove every decision. The clearest case for starting from the feeling.
Refine your sentence from 1.2 with the four steps. Write the final form as: "I want the player to feel ___, especially when ___."
2.2 · The eight formal elements
Every game — chess, poker, DEMOLISH — is built from the same eight parts. They're your X-ray vision: learn to take any game apart with them, and you can assemble your own. Here's each, with what it really controls.
- Players — how many, and the interaction pattern (solo vs. one-against-many vs. team vs. free-for-all). This shapes everything social about the game.
- Objective — what the player is reaching for. It should be clear in seconds and tied to the experience goal.
- Procedures — the actions available (the "verbs"). Fewer, deeper verbs usually beat many shallow ones.
- Rules — the constraints; what you can't do. Rules are where most design happens — they create the interesting decisions.
- Resources — what's scarce and managed (health, time, ammo, money). Scarcity creates meaningful choices.
- Conflict — what stands between player and objective (obstacles, opponents, dilemmas, the clock).
- Boundaries — where the game ends and the world begins (the magic circle, the screen edge, the rules of fair play).
- Outcome — how it resolves (win/lose, a score, an ending). Uncertain outcomes keep players engaged.
DEMOLISH by the parts
| Players | 1, solo high-score | Conflict | ships escape in 10s; speed rises |
| Objective | demolish ships, chain kills | Resources | 3 lives, charge time |
| Procedures | charge → aim → release | Boundaries | one screen |
| Rules | mistime = miss; let it escape = penalty | Outcome | die at 0 lives; beat your score |
Eight slots, one game. Fill them for your idea and you have a design.
2.3 · Change one element, change the game
The elements aren't a checklist — they're dials. Turn one and the whole experience shifts. This is the most powerful design move you'll learn: don't redesign from scratch, adjust one element and playtest.
- Change DEMOLISH's Players from 1 to 2 → now it's competitive or co-op; the feeling becomes social.
- Change the Resource from "3 lives" to "60-second timer" → from cautious to frantic.
- Change the Rule "let it escape = penalty" to "escaped ships come back stronger" → a tension that snowballs.
- Change the Objective from "high score" to "survive 10 waves" → from open-ended to a finish line.
Great iteration is usually one-dial-at-a-time. When a playtest says "it's boring," the fix is almost always tuning a single element, not starting over.
Four dials, four games — from the same base. This is the designer's superpower: you don't start over, you turn one knob and feel the difference.
Take your dissected game from 2.2 and change exactly one element. Describe how the feeling changes.
2.4 · Dynamic systems & emergence
Formal elements are static parts; in motion they produce dynamics — behavior the designer never explicitly wrote. This is the third USC lens, and it's where games become magical.
Emergence
Simple rules, complex play. Chess has a handful of rules and infinite games. In DEMOLISH, "ships escape in 10s" + "more ships each level" together produce a dynamic the code never states: you must prioritize targets under pressure. That tension emerged from two simple rules.
Feedback loops
- Positive (snowball) — success makes more success. Fun briefly, but can run away (a runaway leader).
- Negative (balancing) — success makes it harder. Keeps games close and tense (rubber-banding in racing games).
DEMOLISH uses a negative loop: the better you do, the faster and more numerous the ships. That self-balancing is why it stays tense instead of trivial. Designers shape dynamics by choosing which loops to build.
Watch — "a game is a series of interesting decisions"
Sid Meier (creator of Civilization) on the single most-quoted idea in the field: the systems you build exist to give the player interesting decisions. The dynamics you just met are how those decisions emerge.
2.5 · Dramatic elements — the soul
Formal & dynamic systems are the machine; dramatic elements are the soul that makes players care: challenge, play, premise, character, story.
- Challenge — tuned to the player's growing skill (the "flow channel": not too easy, not too hard).
- Play — the freedom and toys within the rules; the joy of messing about.
- Premise — the fiction that frames it ("you defend the cosmos"). Cheap to add, huge for meaning.
- Character & Story — who you are, what unfolds. Even abstract games imply a story (the comeback, the near-miss).
DEMOLISH is light on story but heavy on premise and character (escalating enemy ships from scout to mothership). This is where an ID designer's empathy shines: you're designing an experience, not just a system. Premise and rising stakes are what turn "click circles" into "defend the galaxy."
AI can
- list mechanics, spot a dominant strategy
- generate premise & character art
Only you can
- name the feeling worth chasing
- tune the flow channel by play
- decide what makes players care
2.6 · The MDA framework
One model ties it all together. MDA = Mechanics → Dynamics → Aesthetics.
- Mechanics — the rules & code you write (the formal elements).
- Dynamics — the run-time behavior that emerges when players act on the mechanics.
- Aesthetics — the feelings produced (your experience goal).
The crucial insight: the designer builds left-to-right (mechanics), but the player experiences right-to-left (aesthetics). You write a rule; the player feels a feeling. The whole craft is predicting that chain — and the only reliable way to check it is to playtest (Module 7).
So when a feeling is missing, you trace back: aesthetic not landing → which dynamic is wrong → which mechanic to change. DEMOLISH: "the kill feels flat" (aesthetic) → "no anticipation or impact" (dynamic) → "add a pre-explosion telegraph + hit-stop" (mechanic). That's MDA debugging in action.
2.7 · Code · your first GDScript
Time to see the machine from the inside. You won't memorize syntax — you'll read it and learn to direct it. Good news: GDScript (Godot's language) is almost exactly Python. If you've seen Python, you're already most of the way there.
The shape of a script
In Godot, a game is a tree of nodes. You attach a script to a node. A script that draws the whole game extends Node2D (a 2D thing in the world). Two special functions run automatically:
extends Node2D            # this script IS a 2D game object

var message = "hello"     # a variable (no 'var' in Python, same idea)
var count = 0

func _ready():            # runs ONCE when the game starts
    print(message)         # Python's print — identical

func _process(delta):     # runs EVERY frame (~60×/sec)
    count += 1             # delta = seconds since last frame
The two hooks you'll use constantly
_ready()— your setup: runs once. Place the cannon, spawn the first ship, start the music._process(delta)— your game loop: runs every frame. Move things, check collisions, redraw.delta(seconds since last frame) keeps motion smooth on any machine:position.x += speed * delta.
That's the skeleton of every Godot game. DEMOLISH is just a big, juicy version of these two functions.
Find each in the snippet: a variable, the once-only function, the every-frame function, and a comment. You just read GDScript — and it was basically Python.
2.8 · Code · the formal elements are variables
Here's the bridge between Module 2's design ideas and real code: each formal element becomes a variable. The game's whole "state" is just a handful of values the loop reads and changes. This is DEMOLISH's actual state:
# Objective & Outcome
var score = 0
var level = 1
# Resources
var lives = 3
# Conflict — the enemy ships on screen
var targets = []
# Boundaries / Players — the cannon you control
var cannon = Vector2(360, 840)
var charging = false     # are we holding to charge?
Procedures & Rules become functions
A procedure (an action) is a function; a rule is an if inside it. When a shot lands, DEMOLISH runs this — pure design, expressed as code you can read:
func _hit(shot, ship):
    ship.armor -= shot.power
    if ship.armor <= 0:        # RULE: armor gone → destroyed
        _explode(ship)          # the juicy payoff
        score += level * 10     # OUTCOME: reward
        targets.erase(ship)
Read it like English: "reduce the ship's armor by the shot's power; if armor is gone, blow it up, add score, remove it." You designed that rule in 2.2 — this is the same idea, told to the engine.
AI writes
- the syntax, the boilerplate
- fixes & explains the code
You decide
- what the variables & rules are
- what should happen on a hit
- whether it feels right
You don't need to write this yet — but you can now read it, which means you can direct AI to change it: "make a perfect-charge hit worth double." That sentence is programming, in the AI era.
2.9 · Exercise — dissect & sketch in code-shape
Pick a game you love. On one page:
- Fill all 8 formal elements (one line each) and name its core verb.
- Guess its experience goal and find one emergent dynamic (something fun the rules didn't directly state).
- Now sketch its state variables like 2.8 — what handful of values would the code track? (e.g.,
score,health,enemies,time_left.)
Do this for three games. You're now reading games as both a designer (elements, feelings) and a maker (state, rules) — the double vision this whole course is building.
Your design brief (the Module 2 deliverable)
Copy this one-pager and fill it for your game. It's your contract with yourself — and the first item in your portfolio.
# [Working title]
Experience goal: I want the player to feel ______, especially when ______.
Core verb: ______
Audience & session: who, how long (aim: 1–3 min)

## Formal elements
Players · Objective · Procedures · Rules
Resources · Conflict · Boundaries · Outcome

## The hook
One emergent dynamic I'm hoping for: ______
Why it's small enough to finish: ______2.10 · The USC playcentric spirit
Everything in this course descends from one tradition: the playcentric method taught at USC Games — consistently one of the very top game programs (Princeton Review 2026: #2 undergraduate, #3 graduate). Its founder, Tracy Fullerton, wrote Game Design Workshop (the field's standard text; 4th ed., CRC Press, 2018), and her USC Game Innovation Lab produced beloved games including Cloud, flOw, Flower, Journey (with thatgamecompany alumni), and Walden, a game.
The three lenses USC teaches
- Formal systems — the parts (the 8 elements in 2.2). The machine.
- Dramatic systems — challenge, premise, character, story (2.3). The soul.
- Dynamic systems — how it behaves in motion: emergence, feedback, balance. The life.
The spirit in one line: design for the player's experience, prototype the cheapest version, playtest relentlessly, and iterate. Innovative games come from that loop — not from copying a genre. This is why we started with a feeling, built it on the cheap, and tuned it from real play.
Watch — a flat game becoming alive
The classic talk "Juice it or lose it" shows the playcentric idea in its purest form: take a working-but-dead game and, with nothing but polish, make it sing. This is exactly the journey DEMOLISH took in 1.3.
Two views of design (a debate worth having)
Designers don't agree on what a game fundamentally is — and holding the disagreement sharpens your own view:
- Systems-first — Sid Meier: a game is a series of interesting decisions you engineer (you watched this in 2.4).
- Truth-first — Jonathan Blow: great design discovers truths already inside a system, rather than authoring content on top. Watch:
Neither is "right." Where you land shapes what you make — and that itself is a design decision.
- Game Design Workshop — Tracy Fullerton (the playcentric bible). read on Internet Archive
- Tracy Fullerton — projects & writing: tracyfullerton.com
- Play the lineage: Journey, Flower, Walden a game — feel what "experience-first" design produces.
- A Theory of Fun — Raph Koster: why "fun" is the brain enjoying learning. talk & overview
- awesome-gametalks — a curated index of the best game-design talks, by theme. browse on GitHub
- Game Maker's Toolkit (Mark Brown) — the best bite-sized design lessons. channel
USC's design courses deliberately stop at paper. We go further — paper to playable to shipped — because AI removes the cost that made code a wall.
3.1 · Why paper first
USC's signature move: don't touch the computer yet. Build the core of your game with paper, cards, and dice, and play it with real hands. Changing a paper rule costs 5 seconds; changing code costs 5 minutes. You find the fun faster on paper.
An ID student already does this — foam mock-ups, cardboard models, user tests. A paper prototype is a design mock-up. You're not learning a new skill; you're pointing an old one at games.
Your studio kit (no computer)
Lay these on the table before you start — this is the whole "engine," and it runs on your hands:
- Index cards — actions, enemies, events, states
- Dice — randomness & chance
- Tokens / coins — score, health, resources
- Paper + tape + scissors — the board, walls, zones
- A timer + a pen — to bound the round and note what happens
Watch — paper-prototyping a video game
A 10-minute walkthrough of taking a digital game idea to a table — exactly the move this module teaches.
3.2 · Translate the game to paper
The real skill here isn't "play a board game." It's translation: taking a video-game idea and finding a physical stand-in for every part of it. Once you can do that, you can prototype almost anything by hand.
| Digital thing | Paper proxy |
|---|---|
| the screen | a sheet, or a grid / lanes drawn on it |
| real-time motion | turns, or a "tick" (clap / timer every few seconds → everything moves one step) |
| enemy spawn | draw a card from a deck |
| enemy behavior / "AI" | a rule written on the card, or a die roll |
| randomness | dice |
| health / armor | tokens you remove one by one |
| score | coins you collect |
| a timer / pressure | a real kitchen or sand timer |
| player input | move a token, place / tap a card, point |
So "shoot" becomes tap a card + remove one armor token; "the enemy advances" becomes move its card one lane each tick. The video game is now playable on a table.
List your game's 5 core digital elements and write each one's paper proxy. That list is your prototype's parts.
3.3 · Worked example — DEMOLISH on paper
Here's the whole translation on a real game. Before any Godot, DEMOLISH could be played with a deck and a timer:
- The screen → a sheet with 3–4 "lanes."
- Ships → index cards in the lanes; each card written with an armor number and a points value.
- "A new ship appears" → draw a card, place it at the top lane.
- "10 seconds to shoot it or it escapes" → flip a 10-second timer; if it runs out, discard the card and lose a point (the penalty rule).
- "Shoot" → tap a card, remove one armor token; at 0 armor, take the card → collect its points (coins).
- "Level up" → when the deck is cleared, deal more cards per round and shorten the timer.
What you learn on the table, in ten minutes, before a line of code: Is the 10-second rule tense or just annoying? Is losing a point for an escape fair or punishing? Does clearing a wave feel good? Every one of those is a real design answer — and changing the rule costs five seconds.
Write your own game's "paper setup" as a list like the one above — screen, pieces, spawn, the core verb, the win/lose rule, the escalation.
3.4 · Prototyping by game type
"But my game is real-time / action — you can't do that on paper." You can: you just abstract time. You're not prototyping the twitch; you're prototyping the decisions, rules, and pacing — which is where fun actually lives.
- Action / arcade (like DEMOLISH) → use ticks or turns: every tick, everything moves one step. Or test a single freeze-frame: "is this one decision interesting?"
- Puzzle → paper is ideal. Draw the grid, move tokens; the rules are the game.
- Strategy / management → cards + tokens + a resource track. This is literally a board game.
- Narrative / choice → index cards as rooms/choices with arrows between them: a branching map.
Which type is your game? Write the one abstraction you'll use to make it paper-playable (e.g. "3-second ticks," "freeze-frame on each shot").
3.5 · Two prototypes, then cut
Make two rough paper prototypes — different core verbs — play both, and kill the worse one. Then scope the survivor down: one screen, one loop, five minutes to play. Cutting what you're attached to, when it doesn't serve the experience goal, is the hardest and most important design skill — and it's cheapest here, on paper.
Common paper-prototype mistakes (self-check)
- ☐ Too many rules — if you can't explain it in two sentences, cut.
- ☐ No clear goal — a player should know what "winning" means within 10 seconds.
- ☐ The core verb isn't fun by itself — no theme or art will fix that.
- ☐ Too much bookkeeping — if setup/admin dominates, abstract it away.
AI can
- print card templates, check rules for loopholes
Only you can
- feel whether it's fun in the hand
- decide what to cut
3.6 · The 30-minute build, playtest & crit
Take your experience goal. Build a playable paper version using one core verb, cards/dice, and a single sheet. Set a 30-minute timer. Play it yourself. Note the first moment it got boring or confusing — that's your next design problem.
First playtest — observation sheet
Now hand it to one other person. Say nothing about how to play. Fill this in while they play:
Understood the goal with no help?   Y / N
First confusion happened at:  ______
First "fun" moment happened at:  ______
Where did it drag / get boring?  ______
The one rule I'll change next:  ______
Present your paper game to the room in 3 sentences: experience goal · core verb · the one thing you changed after the first test. The room answers one question: "What single change would make this more fun?"
A photo or short video of your paper prototype being played + the filled-in observation sheet (3 notes minimum) + the one rule you'll change. Evidence you found the fun on paper, before a single line of code.
4.1 · Variables are design knobs
This module teaches just four ideas, the literacy a designer needs: variable = knob, if = rule, function = behavior, parameter = reusable design control. That's it. We start with the knob.
A variable is a named number the game reads. Change it and the experience changes. You're not "programming" — you're tuning a design parameter. This is real, editable GDScript: change a number on the left, press Run, then click the game — the same click feels different.
Try shake = 2 then Run, click — weak. Try shake = 40, particles = 60, hitstop = 150 then Run, click — mighty. Same click, different feeling — because you changed a variable.
Watch — "Juice it or lose it"
The classic talk that proves the point: the same game, before and after "juice." Every difference you see is a number like the ones you just edited.
The bridge: @export
Mark a variable @export in Godot and it becomes a real slider in the Inspector — so you tune the feel by dragging, exactly like above, with no code touched.
@export var shake_strength: float = 22.0
Now you write GDScript — for real
This is a live GDScript runner (not a video, not JavaScript). var makes a value; print() shows it. Edit the code, press Run, read the output.
The ship has 50 armor.var speed = 220, what is speed?var, the game reads it, and changing it changes the experience. (Not fixed — changing it is the whole point.)4.2 · A line of code changes a feeling
How does a number become a feeling? Through one line. The shake variable you dragged feeds a single line that nudges the camera every frame:
# every frame, jolt the camera by a random amount × shake
camera.offset = random_vector() * shake
Bigger shake → bigger jolt → the explosion feels heavier. The experience isn't magic — it's a number entering a behavior. Once you see this, every "feel" in every game becomes legible: somewhere, a value is feeding a line.
Watch — feel, built one line at a time
Jan Willem Nijman (Vlambeer) adds ~30 of these tiny lines to a dull shooter until it's punchy. Every trick is a variable feeding a behavior.
4.3 · If / else / elif — rules with cases
An if is a rule: "when X, do Y." But real games need more than one outcome, so rules come in four shapes — each is interaction logic, growing in richness.
1 · if — one rule
if armor <= 0:
    explode()
2 · if / else — two outcomes
if armor <= 0:
    explode()
else:
    flash_red()        # it survived the hit
3 · elif — multiple cases (a state ladder)
if armor <= 0:
    explode()
elif armor <= 2:
    color = "red"        # critical
elif armor <= 4:
    color = "orange"     # damaged
else:
    color = "green"      # healthy
4 · match — many clean cases (the game's state)
match state:
    "title":   show_menu()
    "playing": update_game(delta)
    "dead":    show_game_over()
See the rules run — edit the thresholds
This enemy follows the elif ladder above. Click it to damage it: its color changes by rule, and at 0 it explodes. Edit the thresholds, press Run, and watch when each state kicks in.
Try max_armor = 3 (dies fast) or 12 (tanky). Move the elif thresholds and watch the red/orange/green states shift. Rules — and their cases — are the game.
Write the rule yourself
Real GDScript again — edit armor and predict which branch runs before you press Run:
armor so the ship reads green (healthy).if / elif / elif / else ladder, how many branches run?else runs. That ordering is a design tool — put the most specific case first.Add a 4th case to the ladder (e.g. a "yellow" "barely scratched" state), or change else to a reward. Run it. One elif = one design decision.
4.4 · Functions are named behaviors
This is the key mental model. A function is a named behavior — a bundle of lines you can name and reuse. Watch one get built, small to large. (Try the "Show as function" button back in 4.1 — it does exactly this to the explosion code.)
Step 1 — a few loose lines that do something
shake = 22
flash = 0.6
play_sound()
spawn_particles()
Step 2 — wrap them in a name → a reusable behavior
func explode():
    shake = 22
    flash = 0.6
    play_sound()
    spawn_particles()
Step 3 — add a parameter → one behavior, many intensities
func explode(size):
    shake = 8 + size * 2
    flash = 0.3 + size * 0.05
    spawn_particles(10 + size * 4)
function = reusable behavior · parameter = design control.
Now explode(1) is a small pop and explode(5) is a heavy blast — same behavior, tuned by one number. That's the whole trick behind "bigger ships feel heavier."
Edit the whole behavior and run it — the function is the feeling:
Write a behavior yourself
A func bundles steps under a name; return hands a value back. Finish this one:
bonus() so a combo of 7 prints 100 (add an if combo >= 5: return 100).func packages steps under a name so you can reuse them — explode(), take_damage(). Add a parameter and one behavior covers many intensities (explode(1) vs explode(5)).4.5 · From design sentence to function
Here's the move that turns a designer into a prototyper: take a plain-English design sentence and translate it into a function with parameter relationships.
"Bigger ships should feel heavier when destroyed."
func explode(ship_size):
    var shake     = 8    + ship_size * 2
    var hitstop   = 0.04 + ship_size * 0.01
    var particles = 12   + ship_size * 5
Read the relationship: each feedback grows with ship size. The base number is the small case; the × size part is "how much heavier per size step." Tuning those two numbers per line is the design.
Run it — each click spawns a random-size ship, so you feel small vs big differ. Edit the × size multipliers, press Run, and the relationship changes:
Write your own design sentence (e.g. "faster levels should feel more frantic") and sketch the function + parameter relationships. You don't have to run it — just structure it.
4.6 · Read a small Godot script
Reading is more useful than writing. Here is a complete, short GDScript. Don't worry about every symbol — identify the four concepts you now know.
extends Node2D

@export var speed := 220.0
@export var shake_strength := 20.0

var score := 0
var lives := 3

func _process(delta):
    position.x += speed * delta

func take_damage(amount):
    lives -= amount
    if lives <= 0:
        game_over()

func game_over():
    print("Game over")
Label every line as one of four things:
- Knobs (variables you'd tune) →
speed,shake_strength - State (values that change as you play) →
score,lives - Behaviors (functions) →
_process,take_damage,game_over - Rules (ifs) →
if lives <= 0
If you can do this, you can read any small Godot game — and that's the literacy that lets you direct AI.
4.7 · Ask AI to change one function
You won't write games from a blank file — you'll direct AI. But "make my game better" gets garbage. The skill is asking for a small, scoped change to one function, and asking it to explain.
make my game better
Change ONLY the explode(size) function. Bigger ships
should feel heavier: more shake, longer hit-stop, more
particles, and lower-pitched sound. Explain every line.
Rules for working with AI
- Scope it to one function; never accept a whole-project rewrite.
- Make it explain each line — that's how you learn to read.
- When it breaks, paste the exact error message back, not a description.
- Always read & playtest the result. You own whether it feels right.
From a starter Godot project, make a one-screen toy: one player action, one feedback, one rule (failure or score). Direct AI one function at a time; you decide the feel. Submit the playable + your prompt log.
4.8 · A complete tiny game
Now put all four concepts together. This is a whole small game in one short script — knobs, a behavior, a rule, and state, working as a loop. An enemy advances; you click to damage it; it flashes; at zero health it dies and your score goes up. Read it, then play it on the right — and edit the @export knobs to change the feel.
Edit health to 1 (one-shot) or 8 (tanky); move_speed to 30 (slow) or 200 (panic); danger_color to "blue" or "green". Press Run, then play. That's a complete game loop — and you can read and change every line.
Read a whole game, find its knobs / behaviors / rules / state, change the feel, and direct AI to extend it. That is the code literacy this module set out to give you.
4.9 · Practice — Learn GDScript From Zero
You've learned to read code and change knobs, rules, and behaviors. To build real fluency, practice writing it — in a full, free, hands-on course running right here inside the lesson. This is "Learn GDScript From Zero" by GDQuest: an interactive in-browser editor where you write real GDScript and watch it run, one small step at a time. No install, nothing to set up.
Best experienced in fullscreen — if the editor feels cramped, open it in a new tab ↗. Course by GDQuest (open-source), embedded here as practice.
Work through at least the first practices — variables, functions, conditions, loops. They map one-to-one to the four concepts of this module (knob / behavior / rule / pattern). You don't need to finish all of it; the goal is to feel comfortable writing a few lines, not just reading them.
5.1 · Shape language for play
Concept. Round shapes read as friendly; sharp, spiky shapes read as dangerous. You feel it before you think it. In games the test is brutal: it must read at a 32-pixel glance, in motion, against a busy background — long before any detail. Silhouette first, always.
Visual example. Drag the sliders — the creature is the same character; only its shape changes, yet your gut flips from "aw" to "uh-oh." This instinct is what you bring to every AI render.
Same eyes, same size — only the silhouette changes the read.
Read more on shape in character art: How shape can make or break your character art (CreativeBloq).
Draw 3 enemy silhouettes — one friendly, one neutral, one dangerous — black fill only, no detail. Shrink each to 32px: does the read survive? Keep the sheet.
5.2 · From sketch to AI asset
Concept. Lead with your sketch, then let AI render it. Lead with AI and you get generic; lead with design and AI becomes a tireless renderer of your intent.
The non-negotiable prompt constraints (or the asset won't be game-ready):
- Single subject, centered, front/top view
- Flat solid background (magenta #FF00FF for easy keying)
- Consistent lighting across a set · no text, no extra props, no shadow on the background
Visual example. DEMOLISH's enemies, ordered by tier — a human decision (simple → epic). AI painted each; the escalation arc is design.
Pick your "dangerous" silhouette from 5.1. Render it with AI using the constraints above. Save the prompt and the best result. Judge: did the soul survive?
5.3 · Make it game-ready
Concept. A pretty PNG isn't a game asset yet. Game-ready means: transparency (key out the background), crop to the sprite, a sensible pivot (usually center), the right scale, and enough contrast to read over the world.
Code mapping — into Godot. Your image becomes a Sprite2D node; its hit area becomes a CollisionShape2D inside an Area2D; readable size is the node's scale.
Enemy (Area2D)              # the body that can be hit
 ├─ Sprite2D                # your transparent PNG
 └─ CollisionShape2D        # the hittable shape
Godot import & nodes reference: Nodes and Scenes (official docs).
Import your AI asset, make the background transparent, drop it on a Sprite2D in a new Enemy scene with an Area2D + CollisionShape2D. Screenshot the scene.
5.4 · Character behavior as function
Concept. A character isn't just a look — it's a behavior. Art direction becomes behavior through code. Every design decision maps to something in the script:
| Art / design decision | Godot / code |
|---|---|
| enemy image | Sprite2D |
| enemy body (hit area) | Area2D + CollisionShape2D |
| readable size | scale |
| personality (how it moves) | a movement function in _process |
| damage response | take_damage() |
| death | explode() / queue_free() |
The whole enemy, as one short script:
@export var health := 3
@export var move_speed := 80.0
@export var danger_color := Color.RED

func _process(delta):
    position.x -= move_speed * delta        # personality: it advances

func take_damage(amount):
    health -= amount
    modulate = danger_color                 # flash on hit
    if health <= 0:
        explode()

func explode():
    queue_free()                            # remove it
Read it: three @export knobs a designer tunes, a movement behavior, a damage behavior with a rule inside, and death. That's a character expressed as code.
Here it is alive — click the enemy to damage it; edit its knobs and Run:
How nodes talk to each other: Signals (official docs).
Give your enemy one behavior function (e.g. take_damage). Tune the @export knobs in the Inspector. Keep the script.
5.5 · Character sheet (the Module 5 deliverable)
Assemble everything from this module into one character sheet — proof you can take a drawing all the way to a playable object:
- ☐ Silhouette sheet (the 3 from 5.1, with the 32px read)
- ☐ AI prompt log (the prompts + which you chose)
- ☐ Final transparent PNG (game-ready)
- ☐ Godot scene screenshot (Sprite2D + Area2D + CollisionShape2D)
- ☐ One behavior function (your
enemy.gd)
AI rendered
- the art, the variations
You authored
- the silhouette & soul
- readability & game-ready prep
- the behavior & how it feels
You just turned a drawing into a playable object. That's the bridge most artists never cross.
6.1 · World as art direction
A world is art direction: mood, palette, composition, and meaning. AI can render any cosmos you describe — but which one, in what order, with what feeling, and readable enough to play on? That's the designer's call.
A world also moves — and motion is code. DEMOLISH's depth comes from a parallax starfield: far stars drift slowly, near stars fast. Edit the numbers and Run to feel how a few values become a living cosmos:
Try star_count = 400, scroll_speed = 120, layers = 5 → Run. A denser, faster, deeper world — from three numbers.
6.2 · The escalation arc
Eight backgrounds, each level "more wondrous than the last" — a human-directed emotional arc from calm starfield to transcendent fractal nebula. AI painted them; the sequence and intent are design.

6.3 · Readability — the designer's constraint
A background can't just be pretty — the bright UI and ships must still read on top of it. So the prompt carries a design constraint: "dark enough for game UI." This is pure ID thinking: form in service of function. Curating for playability, not just beauty, is the designer's job.
Art direction board (the Module 6 deliverable)
Mood (3 words): ______
Palette: primary ____  secondary ____  accent ____ (hex)
Light direction: ______        Detail level: ______
READABILITY TEST: put white UI text + a ship on the bg → still legible?  Y / N
UI CONTRAST TEST: does the brightest element pop against the darkest bg?  Y / N
Escalation: how does level N+1 feel more wondrous / intense than N?
AI generated
- every background & track
You art-directed
- mood, palette, composition
- the escalation from calm → sublime
- readability (UI must survive)
6.4 · World as sound
A world is heard as much as seen. Each DEMOLISH level gets its own music, escalating with the visuals — AI-generated, but chosen and sequenced by a human to match the rising stakes.
6.5 · World in Godot
Concept. A world isn't one painting — it's a few Godot nodes you arrange. Each art decision maps to a node, the same way a character did in 5.3.
| World element | Godot node |
|---|---|
| background image | Sprite2D or TextureRect (full-screen) |
| parallax depth | Parallax2D layers |
| global mood / tint | CanvasModulate (one color over everything) |
| music / ambience | AudioStreamPlayer |
So escalating a level's mood is just two lines — a designer's decision, in code:
func enter_level(level):
    $CanvasModulate.color = level.tint      # the whole scene shifts mood
    $Music.stream = level.track             # the world's sound
    $Music.play()
Godot nodes & scenes: official docs.
Drop a background on a TextureRect, add a CanvasModulate, and tint two "levels" two different moods. Same scene, two worlds.
6.6 · Readability crit
Concept. Pretty is easy; readable is design. Before a world is done, run it through four fast tests — the same ones art directors use in crit:
- Grayscale test — desaturate the screenshot. Can you still tell player / enemy / background apart by value alone? If not, you're leaning on color as a crutch.
- Thumbnail test — shrink it to ~64px. Does the important stuff still pop?
- UI contrast test — does the brightest UI text survive on the darkest and the brightest patch of the background?
- 3-second test — flash a screenshot to a stranger for 3 seconds. Can they say what they control and what to avoid?
One page: palette (hex) + 1 reference + your background + a player / enemy / UI readability test that passes the four crits above. The world half of your concept package.
7.1 · Shut up and watch
Playtesting is the "crit" of games — and ID students already live in crit culture. The discipline: put the game in front of real people, shut up, and watch. Don't explain, don't hint. Note where they get stuck, laugh, or go quiet.
7.2 · Sorting feedback
Sort everything you hear into three buckets:
- Core problem — fix it.
- Tune the numbers — easy dial.
- Personal taste — usually ignore.
Golden rule: players' problems are almost always right; their fixes are almost always wrong. Listen for the problem, design the fix yourself.
7.3 · Case study — "the last moment feels flat"
DEMOLISH was tuned exactly this way. One tester said "the last moment feels flat" → that single observation produced the entire anticipation system. Another said "level 2 is hard" → the difficulty curve was softened, charge time shortened. Real testing, real changes, in hours.
This is what tuning from feedback looks like. A tester says "too easy" → raise move_speed. "Too tanky" → lower health. Change a number, Run, re-test — the whole loop, live:
AI can
- summarize notes, suggest tweaks from data
Only you can
- read a face mid-play
- tell a real problem from a stray opinion
7.4 · The playtest kit
Playtesting only works if it's structured. Here is the kit USC-style studios use — copy it, run it on three people, and submit the filled-in version as your Module 7 artifact.
① The session script (≈10 min per tester)
- Set up (30s): "I'm testing the game, not you. Think aloud. There are no wrong moves." Then say nothing about how to play.
- Hand it over. Watch them find the controls themselves — that's data.
- Stay silent. Do not rescue them. Bite your tongue. Note where they struggle.
- Debrief (3 questions): "What were you trying to do?" · "When were you confused or bored?" · "What did you feel at the best moment?"
② Observer checklist (tick while they play)
- ☐ Did they understand the goal in <10s, with no help?
- ☐ Time to first success: ____ seconds
- ☐ Where did they get stuck or confused?
- ☐ Where did they smile / lean in / say "whoa"?
- ☐ Where did they get bored or want to quit?
- ☐ Did they say "one more"? (the gold signal)
③ Sort the feedback (three buckets)
| Bucket | Meaning | Action |
|---|---|---|
| Core problem | breaks the experience goal | fix it next |
| Tune the number | a value feels off | adjust & re-test |
| Personal taste | one person's preference | usually ignore |
Remember the golden rule: players' problems are almost always right; their fixes are almost always wrong. Take the problem, design the fix yourself.
④ The iteration decision log
One row per change — this is your evidence of iteration (worth 20% of the grade):
OBSERVATION  → what you saw a tester do
INTERPRET    → what it means (the real problem)
CHANGE       → the one thing you'll change
RESULT       → did the next test confirm the fix?

# DEMOLISH example, real:
OBSERVATION  tester: "the kill feels like nothing"
INTERPRET    no anticipation, no impact on the payoff
CHANGE       add white-hot telegraph + hit-stop + shake
RESULT next test: "oh that's satisfying" ✓Run this kit on 3 people with your game. Submit: the filled observer checklists, your bucketed feedback, and at least 2 rows of the iteration log (with results).
8.1 · What counts as finished
For Game101, "finished" is not a fully shipped game — that's where Game102 takes you. Here, finished means a portfolio-ready playable concept package: experience goal, core verb, paper prototype, asset sheet, code-literacy annotation, playtest notes, and a revised design brief. That package is your grade.
Still, it helps to know the bar a fully shipped game clears — so you know what you're aiming at in Game102. A shipped game has all of these:
- ☐ a title screen
- ☐ one playable loop (a verb you repeat)
- ☐ a score / win / lose
- ☐ a restart
- ☐ sound (and ideally an on/off)
- ☐ a web export anyone can open by link
- ☐ a one-paragraph description
This is what "shipped" looks like — DEMOLISH, the whole arc of this course, running by link in your browser. Your prototype needs to clear the same bar (it can be far smaller):
Not loading? open in a new tab.
8.2 · The finish pass — the last 20%
A toy becomes a shipped game in the finish pass: the unglamorous last 20% that's actually most of the perceived quality. Do these, in order:
- Remove broken features. Half-working things read as bugs. Cut them.
- Make the UI readable. Bigger text, more contrast, clear what's clickable.
- Fix the first 10 seconds. Can a stranger understand the goal and act, with no help?
- Tune the difficulty. The early game should be winnable; the curve should climb.
- Add a restart button. Failing should never mean reloading the page.
Here's the loop to polish — a complete tiny game. Make it readable and fair by tuning, then Run:
8.3 · Export from Godot (web)
Stretch / preview for Game102. Exporting and publishing are not required to finish Game101 — your deliverable is the concept package. This is here so you know the road ahead; in Game102 you'll do it for real.
- Add a Web preset: Project → Export → Add… → Web. (Single-threaded preset = simplest hosting.)
- Export Project → a folder with
index.html+.wasm+.pck+.js. - Test locally with a tiny server — never double-click
index.html(browsers block it). - Gotcha: load runtime assets with
load("res://..."), not raw file reads, or they vanish in the export.
Official guide: Exporting for the Web (Godot docs).
New to Godot? Watch one full beginner workflow
Brackeys' beginner tutorial walks the whole loop — project → nodes → script → play — in one sitting. Worth one watch before your first build.
8.4 · Publish — itch.io / GitHub Pages
Stretch / preview for Game102. Optional in Game101 — try it if you're curious, but it isn't graded here. Full publishing is the spine of Game102.
See the whole path, end to end: Godot export folder → upload → test the link → share.
itch.io (easiest for games)
- Zip the export folder (with
index.htmlat the top). - itch.io → Create new project → Kind: HTML → upload the zip → tick "play in browser."
- Set the viewport size, hit Save, open the page, play it. Free, with a built-in audience.
GitHub Pages (your own link)
- Put the export files in a repo; enable Settings → Pages on the main branch.
- Wait ~1 min → your game is at
you.github.io/your-game/. Handles the ~35MB engine file (Cloudflare Pages won't).
Always play the hosted link on someone else's device before calling it shipped.
8.5 · Portfolio process page
For a student, the process is the portfolio. Assemble one page that shows you can run the whole thing — strong enough to support a USC IMGD application.
1. Experience goal      — the one sentence
2. Original sketch      — your hand drawing
3. Paper prototype      — photo + what you learned
4. Art iterations       — AI prompts + chosen results
5. Code change          — before / after (a feel tweak)
6. Playtest quote       — one real thing a tester said
7. Final link           — the playable game
This is what gets graded (and what a portfolio reviewer reads): not just a game, but a designer who can run the whole process.
8.6 · Postmortem
End every project with a postmortem — three honest sections is enough:
# [Game] — Postmortem
## What worked
## What failed
## What I'd change next time
This is where the learning sticks, and a clear-eyed postmortem signals a serious designer. Then carry it into Game Design II — Make & Ship: real GDScript, art & sound pipelines, production, and the Brackeys jam as your capstone.
Done > perfect. Now go make something only you could make.